All Categories
Featured
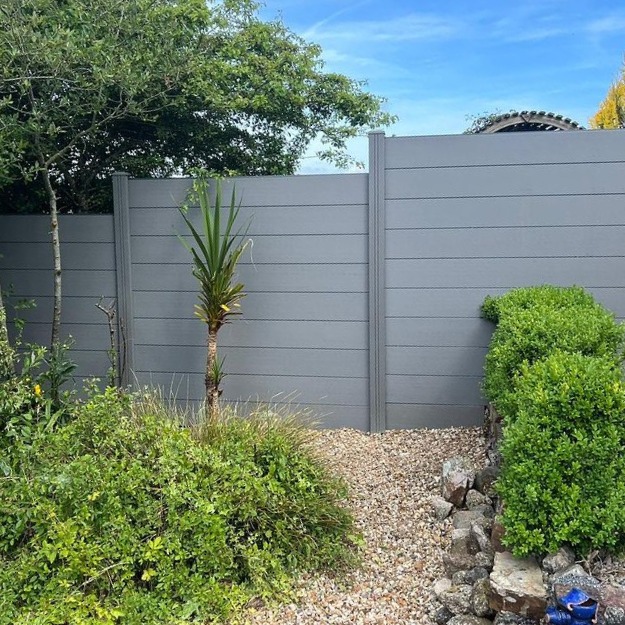
A leaning or damaged fence message can be a significant aggravation, impacting the security of your entire fence. Whether due to weather, aging, or external stress, a leaning fence message can create a drooping or uneven look that not just compromises your fence's stability however additionally its security.
![]()
Soil erosion: In time, the dirt around the base of the article might deteriorate because of heavy rain or flooding, creating the article to lean. Rot: Wood fencing messages can rot at the base because of prolonged direct exposure to moisture, causing instability. Stress: Outside pressures such as wind, the weight of the fencing, or leaning branches can cause the blog post to lean or damage. You can pick the most appropriate solution. when you've determined the type of damages.
Choice 1: Concrete: Prepare a bag of quick-setting concrete mix. Follow the supplier's instructions for the proper water-to-mix proportion. Put the concrete around the base of the post, filling the hole. See to it the blog post stays degree as the concrete sets. It typically takes concerning 20-30 minutes to begin establishing, yet it's finest to leave it uninterrupted for 24 hr for full healing.
Option 2: Gravel: If you favor a quicker, much less permanent solution, you can make use of crushed rock rather than concrete. Pour gravel around the base of the message, ensuring it's stuffed snugly. This alternative enables for far better water drainage around the base, which can avoid more rot and leaning in the future.
![]()
Step 1: Eliminate the broken or rotted blog post by loosening the concrete or gravel around it using a sledgehammer or blog post puller. Step 2: Once the article is removed, prepare the hole for the brand-new message by guaranteeing it's deep sufficient to suit the new message and the material for support (concrete or gravel) Action 3: Install the new article in the opening, making sure it's degree and straightened with the various other posts. Tip 4: Follow the same steps for safeguarding the new blog post as described earlier, either making use of concrete or gravel for stability. 6. Strengthen with Braces (If Needed) If the blog post is still not secure after straightening out and safeguarding it, take into consideration enhancing it with added assistance. You can use an angled brace to hold the message upright up until the concrete completely sets or as a long-term support. Affix one end of the brace to the top of the article and the other end to a close-by fence post or sturdy support. This will certainly avoid the post from leaning again.
![]()
Conclusion. Taking care of a leaning or damaged fence blog post is an easy yet gratifying job that can recover your fencing's security and look. By adhering to these actions and dealing with the source of the issue, you can guarantee that your fence stays upright and secure for many years ahead. Whether you're aligning a leaning blog post or replacing one that's past repair, taking care of your fencing articles promptly will help you preserve the stability and protection of your fencing.
- Assess the Damage. Before you begin fixing the leaning fence post, it is essential to evaluate the damage completely. Determine whether the article is simply leaning or if it's broken, decomposed, or damaged at the base. Typical causes for leaning fencing articles consist of:
Soil erosion: In time, the dirt around the base of the article might deteriorate because of heavy rain or flooding, creating the article to lean. Rot: Wood fencing messages can rot at the base because of prolonged direct exposure to moisture, causing instability. Stress: Outside pressures such as wind, the weight of the fencing, or leaning branches can cause the blog post to lean or damage. You can pick the most appropriate solution. when you've determined the type of damages.
- Dig Around the Base of the Post. To repair a leaning message, you'll need to subject the base. Begin by excavating around the base of the post with a shovel, creating a hole regarding 12 inches vast and 18 to 24 inches deep. Be cautious not to damage the post additionally as you dig. You wish to make certain the dirt surrounding the post hangs sufficient to allow for repositioning or extra support.
- Straighten the Article. If the blog post is only leaning and not badly harmed, you can straighten it before protecting it once more. Use a degree to guarantee the message is aligned effectively, seeing to it it's vertical. You might need an assistant for this step to keep the message in position while you add assistance.
- Add New Concrete or Crushed Rock. To reinforce the message and stop future leaning, you will certainly need to include new concrete or gravel to the base. Below's exactly how to do it:
Choice 1: Concrete: Prepare a bag of quick-setting concrete mix. Follow the supplier's instructions for the proper water-to-mix proportion. Put the concrete around the base of the post, filling the hole. See to it the blog post stays degree as the concrete sets. It typically takes concerning 20-30 minutes to begin establishing, yet it's finest to leave it uninterrupted for 24 hr for full healing.
Option 2: Gravel: If you favor a quicker, much less permanent solution, you can make use of crushed rock rather than concrete. Pour gravel around the base of the message, ensuring it's stuffed snugly. This alternative enables for far better water drainage around the base, which can avoid more rot and leaning in the future.
- Replace the Post (If Necessary) It may be best to replace the article completely if the post is seriously harmed or decayed at the base. This procedure includes eliminating the harmed blog post, which can be challenging if it's deeply ingrained in concrete or crushed rock. Right here's how to change it:
Step 1: Eliminate the broken or rotted blog post by loosening the concrete or gravel around it using a sledgehammer or blog post puller. Step 2: Once the article is removed, prepare the hole for the brand-new message by guaranteeing it's deep sufficient to suit the new message and the material for support (concrete or gravel) Action 3: Install the new article in the opening, making sure it's degree and straightened with the various other posts. Tip 4: Follow the same steps for safeguarding the new blog post as described earlier, either making use of concrete or gravel for stability. 6. Strengthen with Braces (If Needed) If the blog post is still not secure after straightening out and safeguarding it, take into consideration enhancing it with added assistance. You can use an angled brace to hold the message upright up until the concrete completely sets or as a long-term support. Affix one end of the brace to the top of the article and the other end to a close-by fence post or sturdy support. This will certainly avoid the post from leaning again.

- Normal Upkeep. Once the leaning message is taken care of, make certain to frequently examine the posts for signs of damage or leaning. Examine the problem of the wood or various other products made use of in your fence to prevent future problems. If you live in an area susceptible to hefty rains or soil disintegration, take into consideration adding additional assistance to your blog posts by making use of concrete or crushed rock and guaranteeing appropriate drainage around the blog posts.
Conclusion. Taking care of a leaning or damaged fence blog post is an easy yet gratifying job that can recover your fencing's security and look. By adhering to these actions and dealing with the source of the issue, you can guarantee that your fence stays upright and secure for many years ahead. Whether you're aligning a leaning blog post or replacing one that's past repair, taking care of your fencing articles promptly will help you preserve the stability and protection of your fencing.
Latest Posts
Unrivaled Top Quality and Custom Solutions for every single Home
Published Apr 21, 25
1 min read
Safeguard Your Future with WyHy's Special Certification Options
Published Apr 21, 25
1 min read
Long Lasting Fencing Solutions for Your Yard, Ranch, or Cattle Ranch
Published Apr 21, 25
1 min read
More
Latest Posts
Unrivaled Top Quality and Custom Solutions for every single Home
Published Apr 21, 25
1 min read
Safeguard Your Future with WyHy's Special Certification Options
Published Apr 21, 25
1 min read
Long Lasting Fencing Solutions for Your Yard, Ranch, or Cattle Ranch
Published Apr 21, 25
1 min read